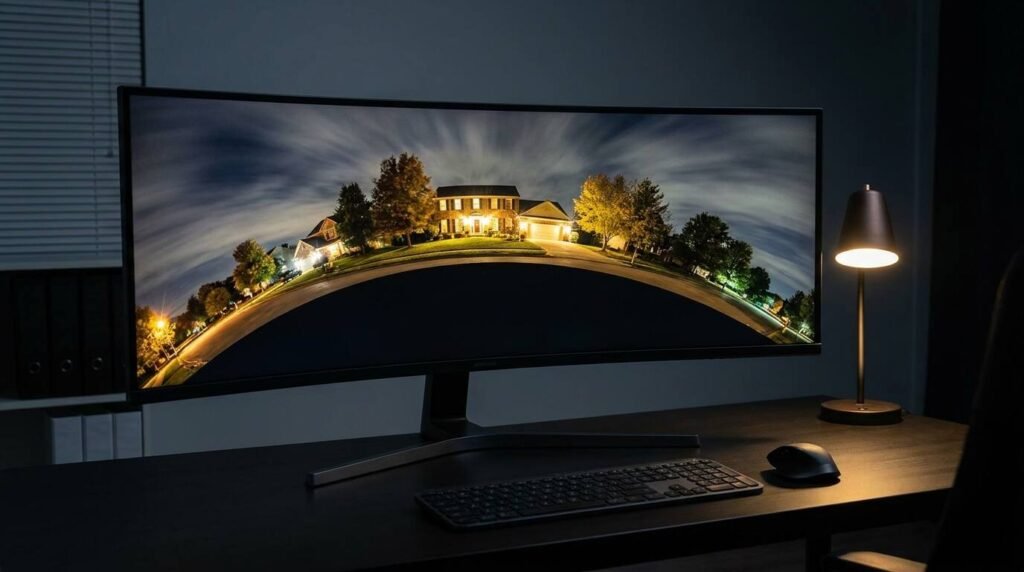
How We Shot the Backyard at Night and Turned It Into a 360° Tour — From DJI Avata to Pannellum

There’s a moment in every showing that sellers don’t see. The buyer walks out the back door for the first time — steps onto the patio, takes in the yard, reads the space — and something either clicks or it doesn’t. That moment is over in eight seconds. And until recently, no static photograph came close to capturing it.
The 360° tour on this site isn’t a Matterport scan. It wasn’t produced by an outside vendor or licensed from a platform. It was built in-house, from capture to color to code, using equipment that fits in a bag and software that anyone serious about real estate marketing should understand. I want to walk you through exactly how it was made — because if you’re listing a property and we’re working together, this is part of what you’re getting.
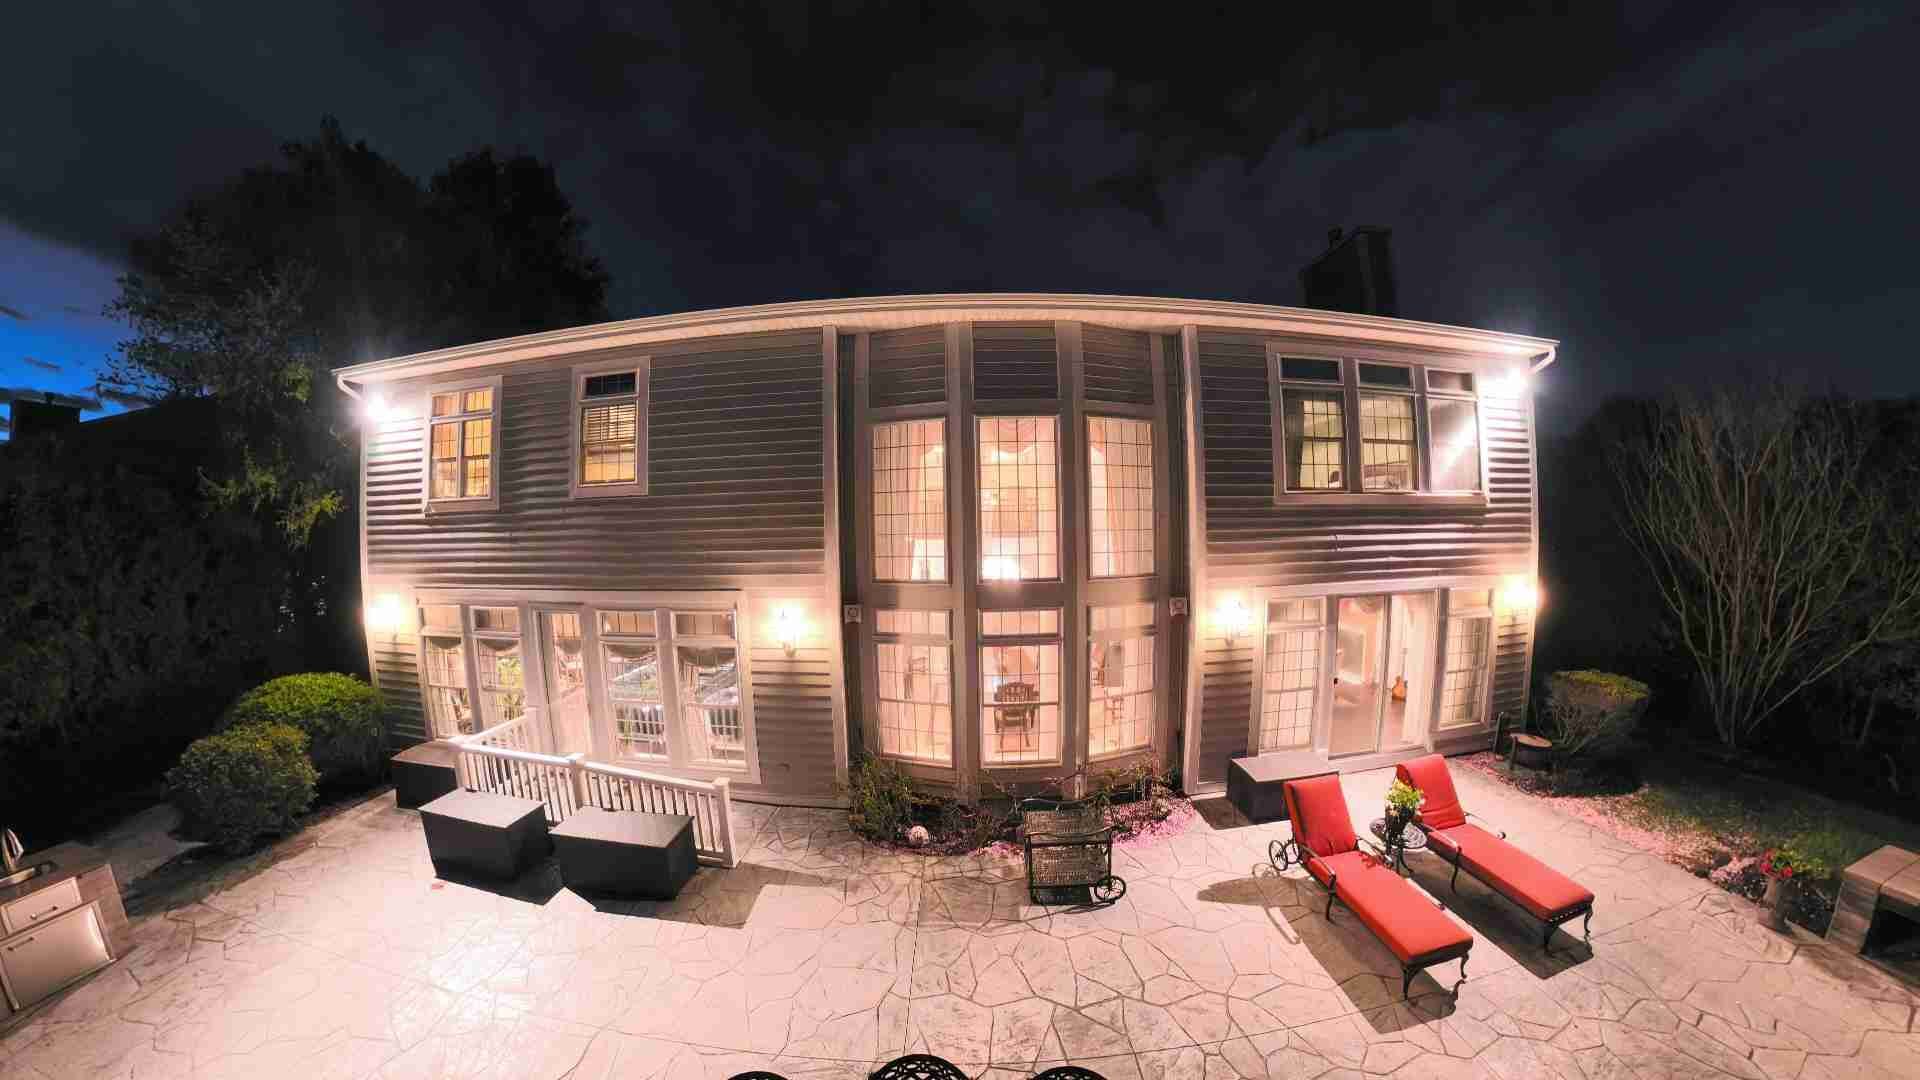
The Setup: House in Full Light, Sky Completely Dark
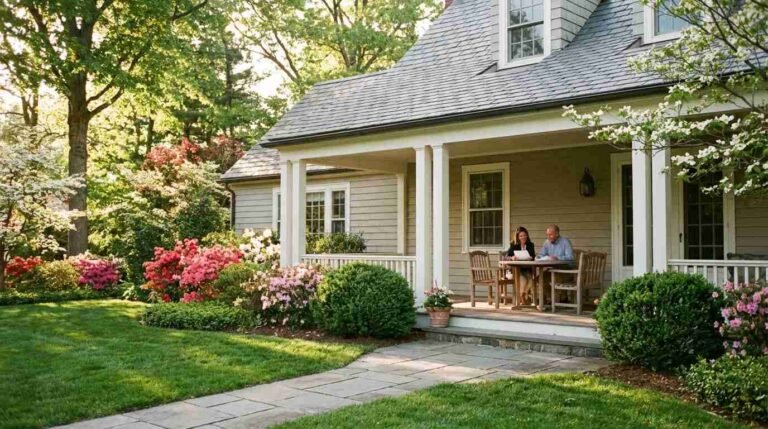
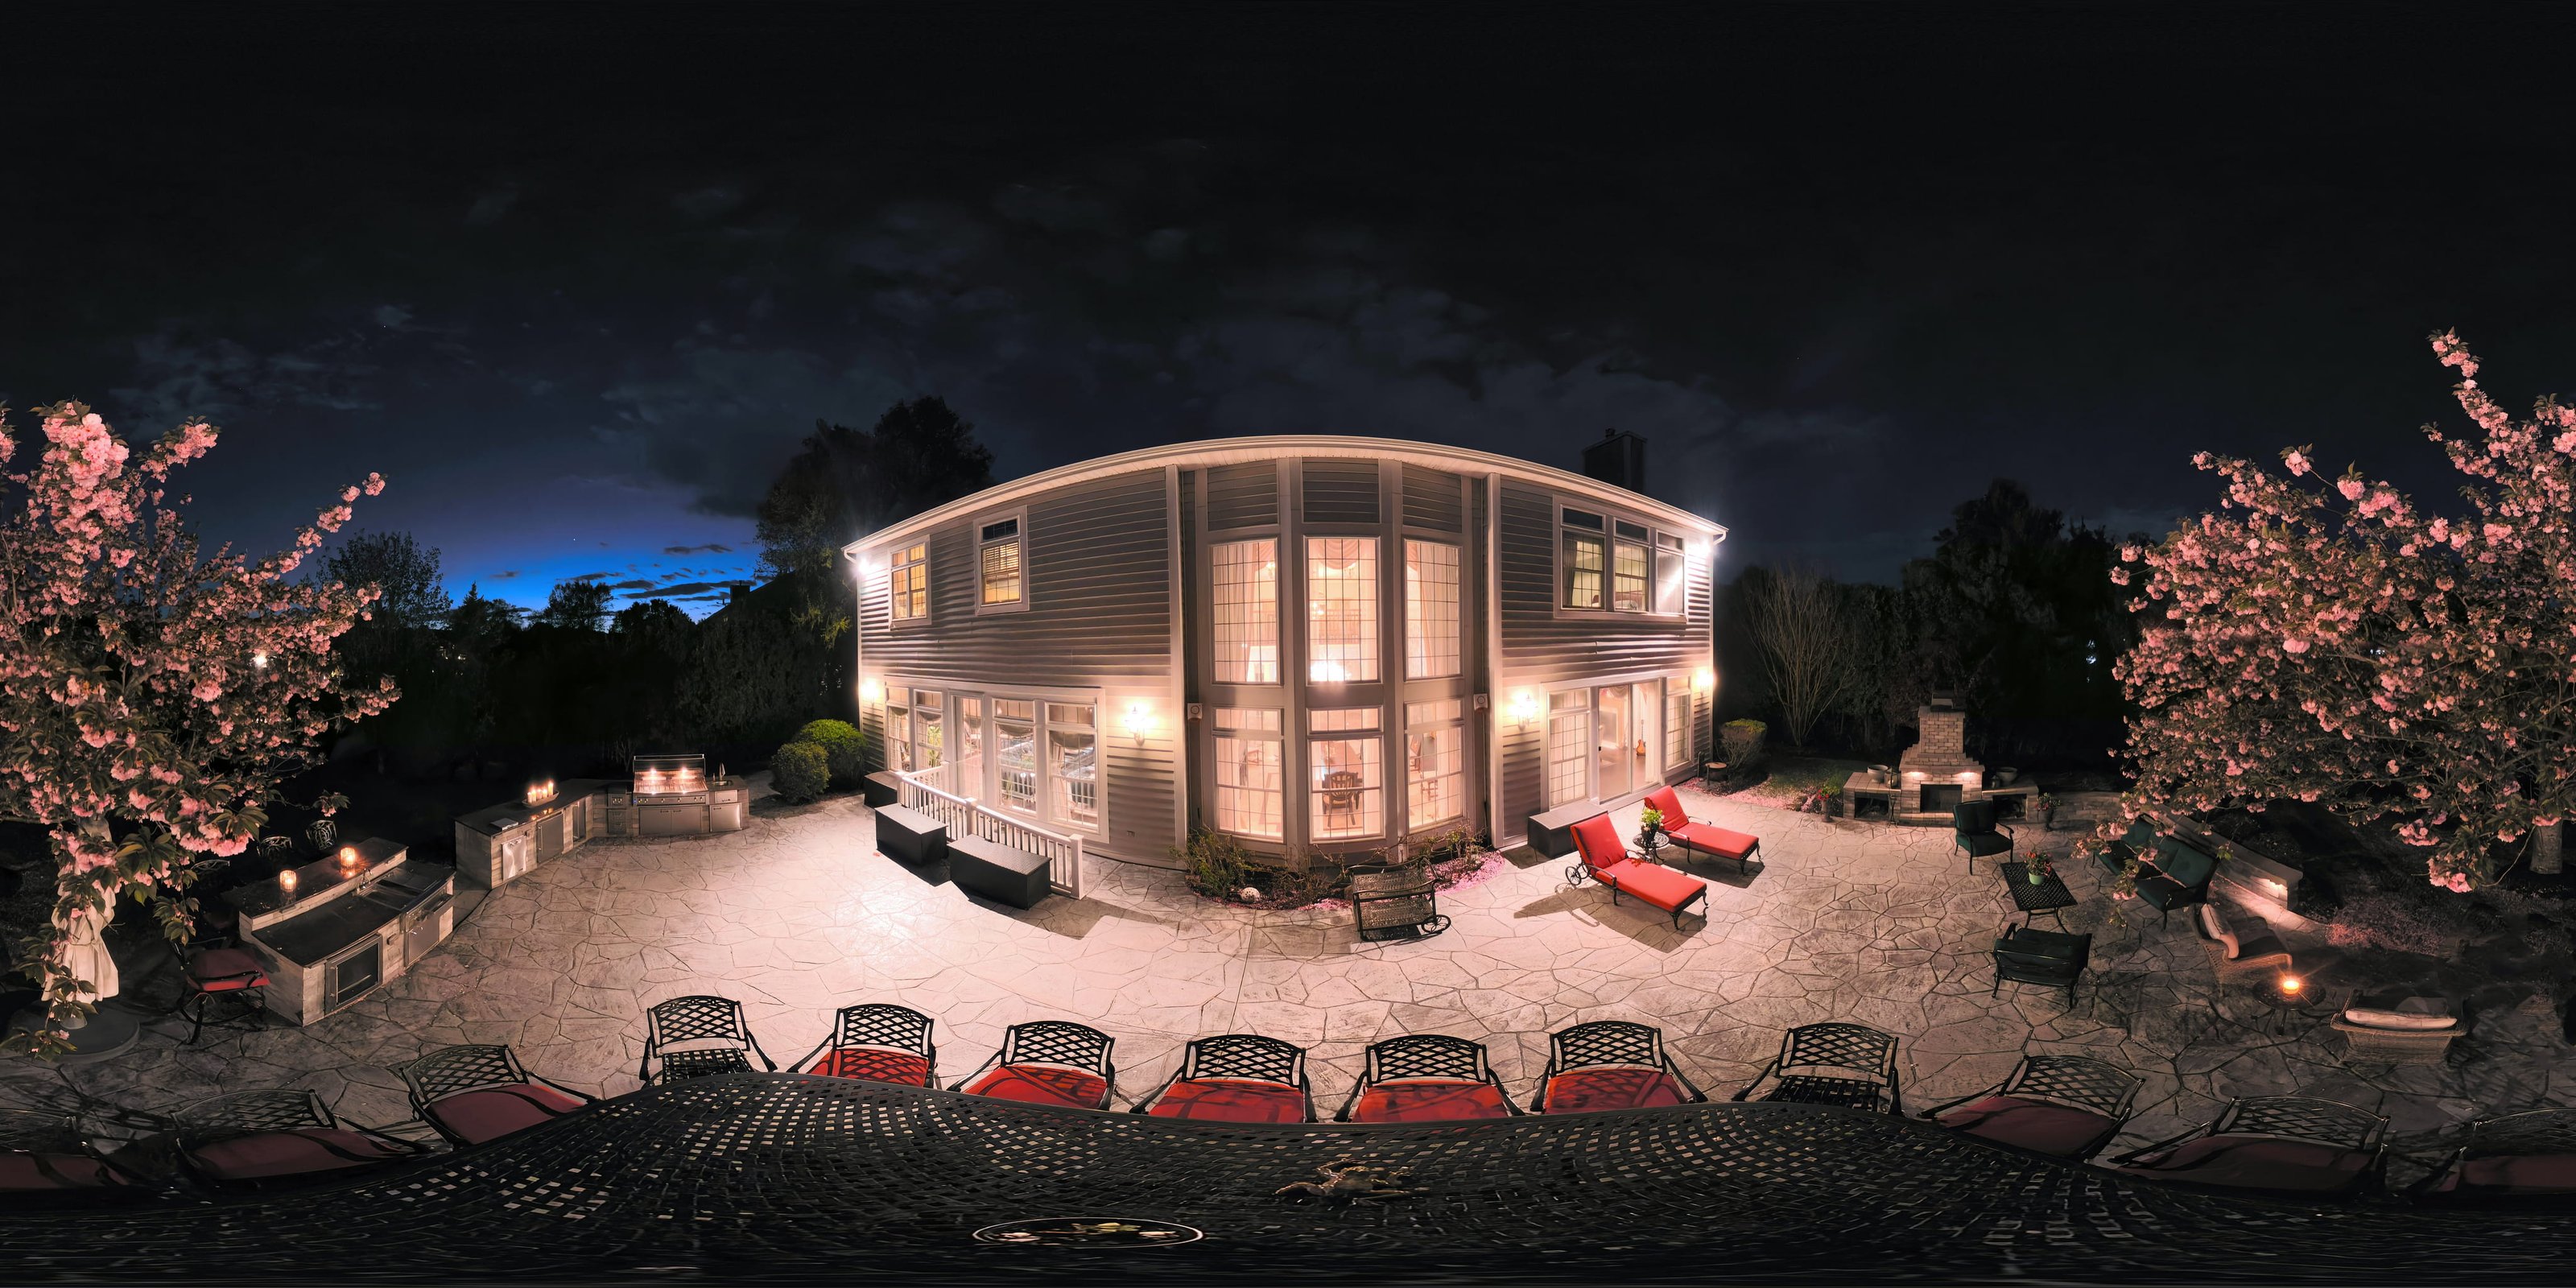
We chose a backyard night shot deliberately. Daytime exteriors are everywhere in listing photography — every property looks the same at 2 p.m. on a sunny afternoon. A house lit from within against a dark sky tells a different story. It says: someone lives beautifully here. It puts warmth behind every window. It makes the space feel inhabited rather than staged.
Preparation took longer than the shoot itself. Every interior light in the house was switched on — overhead fixtures, lamps, under-cabinet lighting, everything. Candles were placed in the windows visible from the backyard. The goal was to make the home glow, to turn the windows into lanterns against the night. Then we waited. Not for golden hour — for complete darkness, the kind that doesn’t compromise. The camera doesn’t lie about a partially lit sky, and the equirectangular format means the entire hemisphere will be in the frame. There’s no cropping a bad sky out of a 360°.
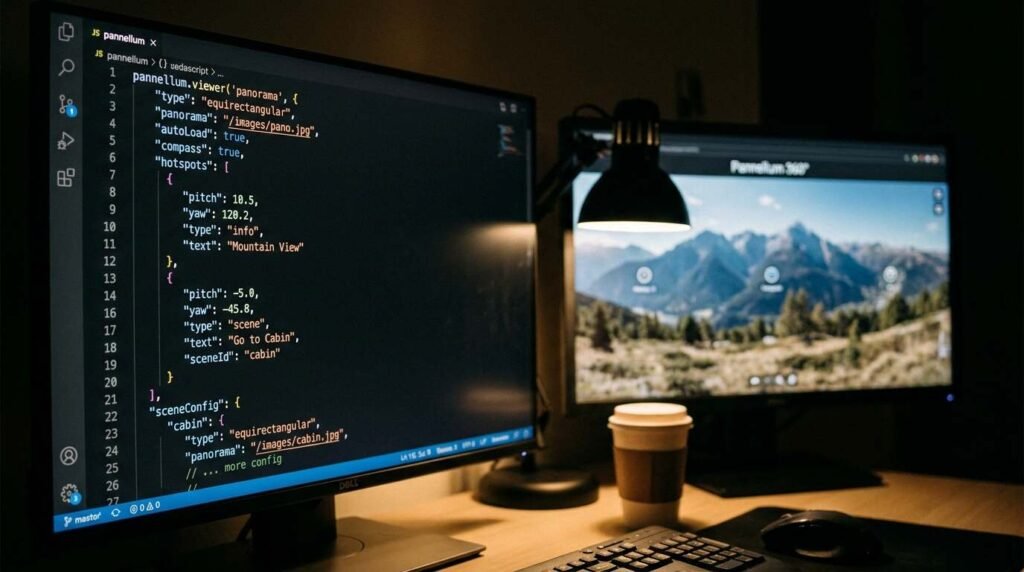
The Camera: DJI Avata 2 in 360° Mode at 8K
The capture was done with the DJI Avata 2 shooting in 360° mode at 8K resolution. The Avata 2 uses a dual-fisheye lens arrangement — two ultra-wide lenses, mounted back to back, each capturing a full hemisphere. The camera stitches these into a single equirectangular image in-camera: a flat 2:1 rectangular file that encodes the complete sphere, distorted in a way that Pannellum and every other viewer knows how to unwrap.
Eight thousand pixels of horizontal resolution sounds like more than you need — and for web delivery, it is. But it’s exactly right for 360° work, because resolution is consumed by the projection math. When a viewer unfolds a sphere across a flat screen, pixels spread thin. Start with 8K and you deliver an image that holds up when the buyer zooms in on the fire pit, the fence line, the tree canopy at the property boundary. Start with 4K and you’re showing them a soft blur.
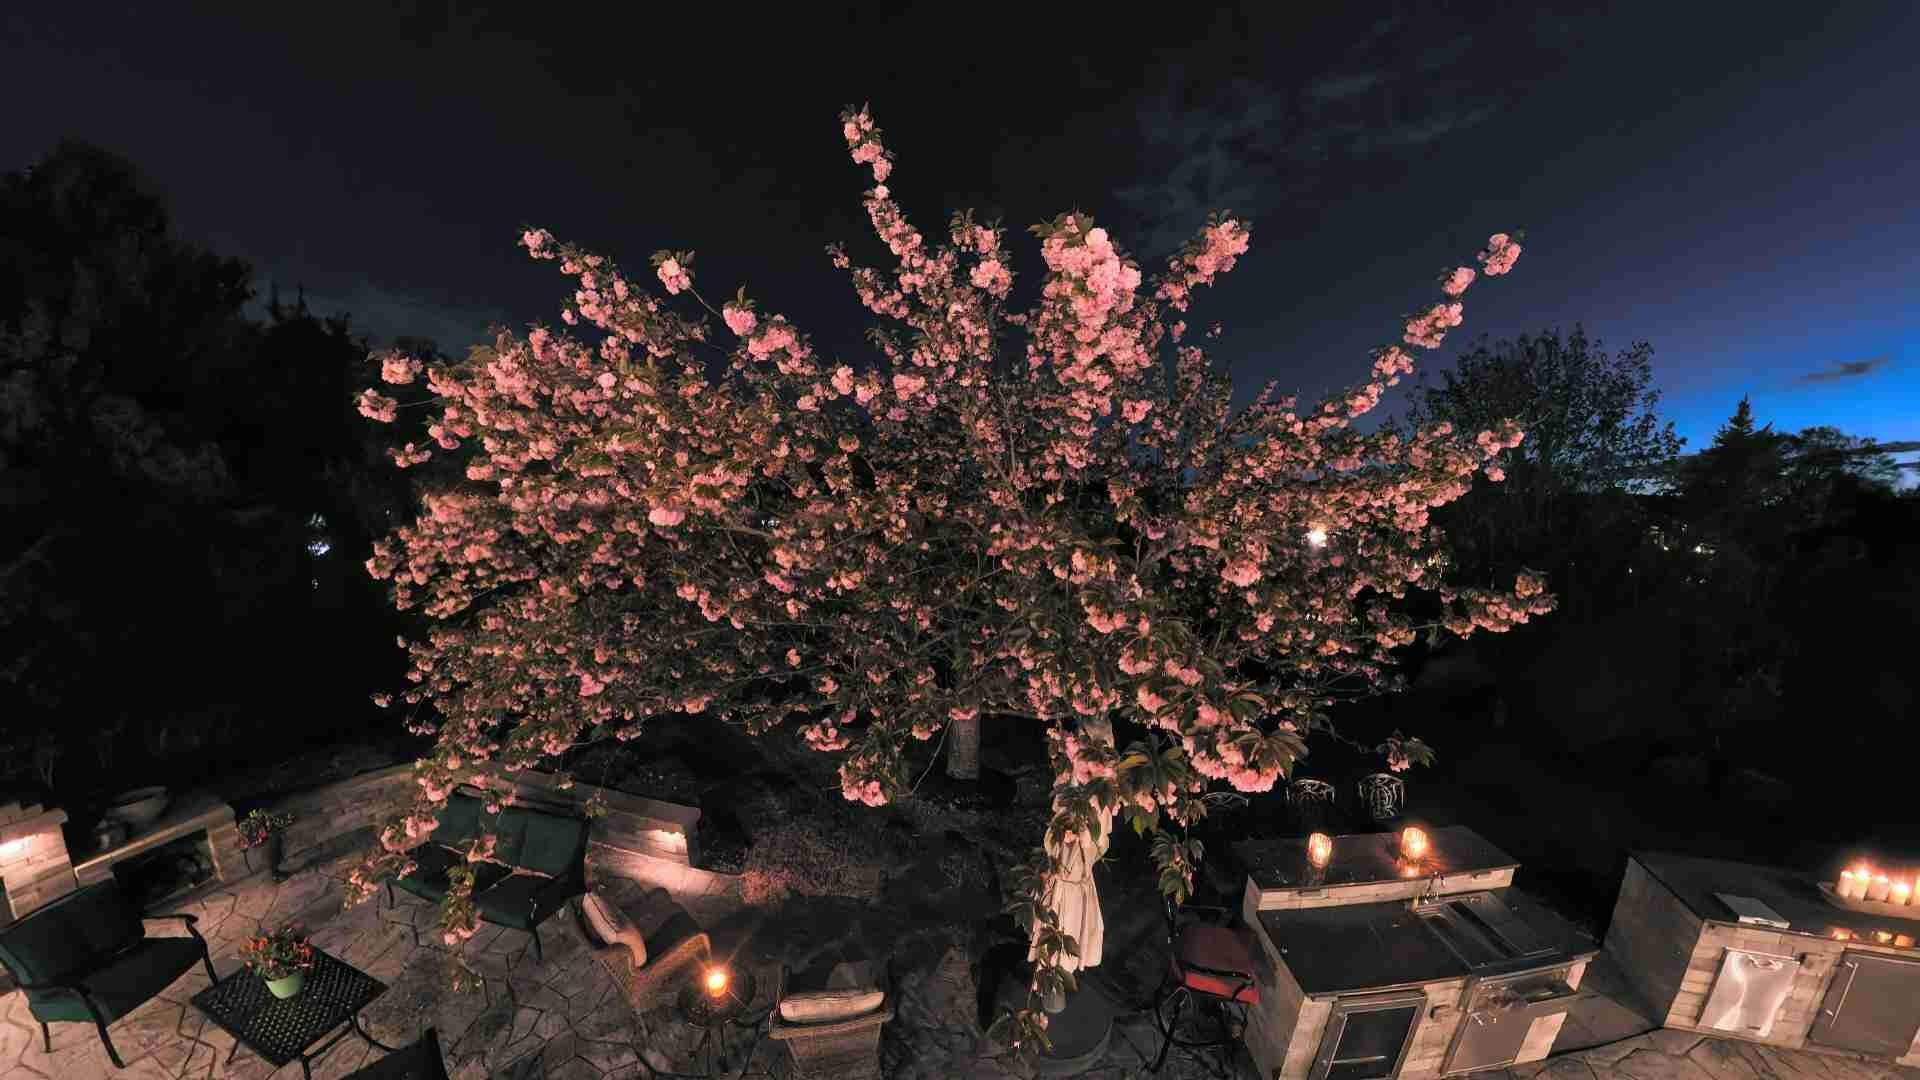
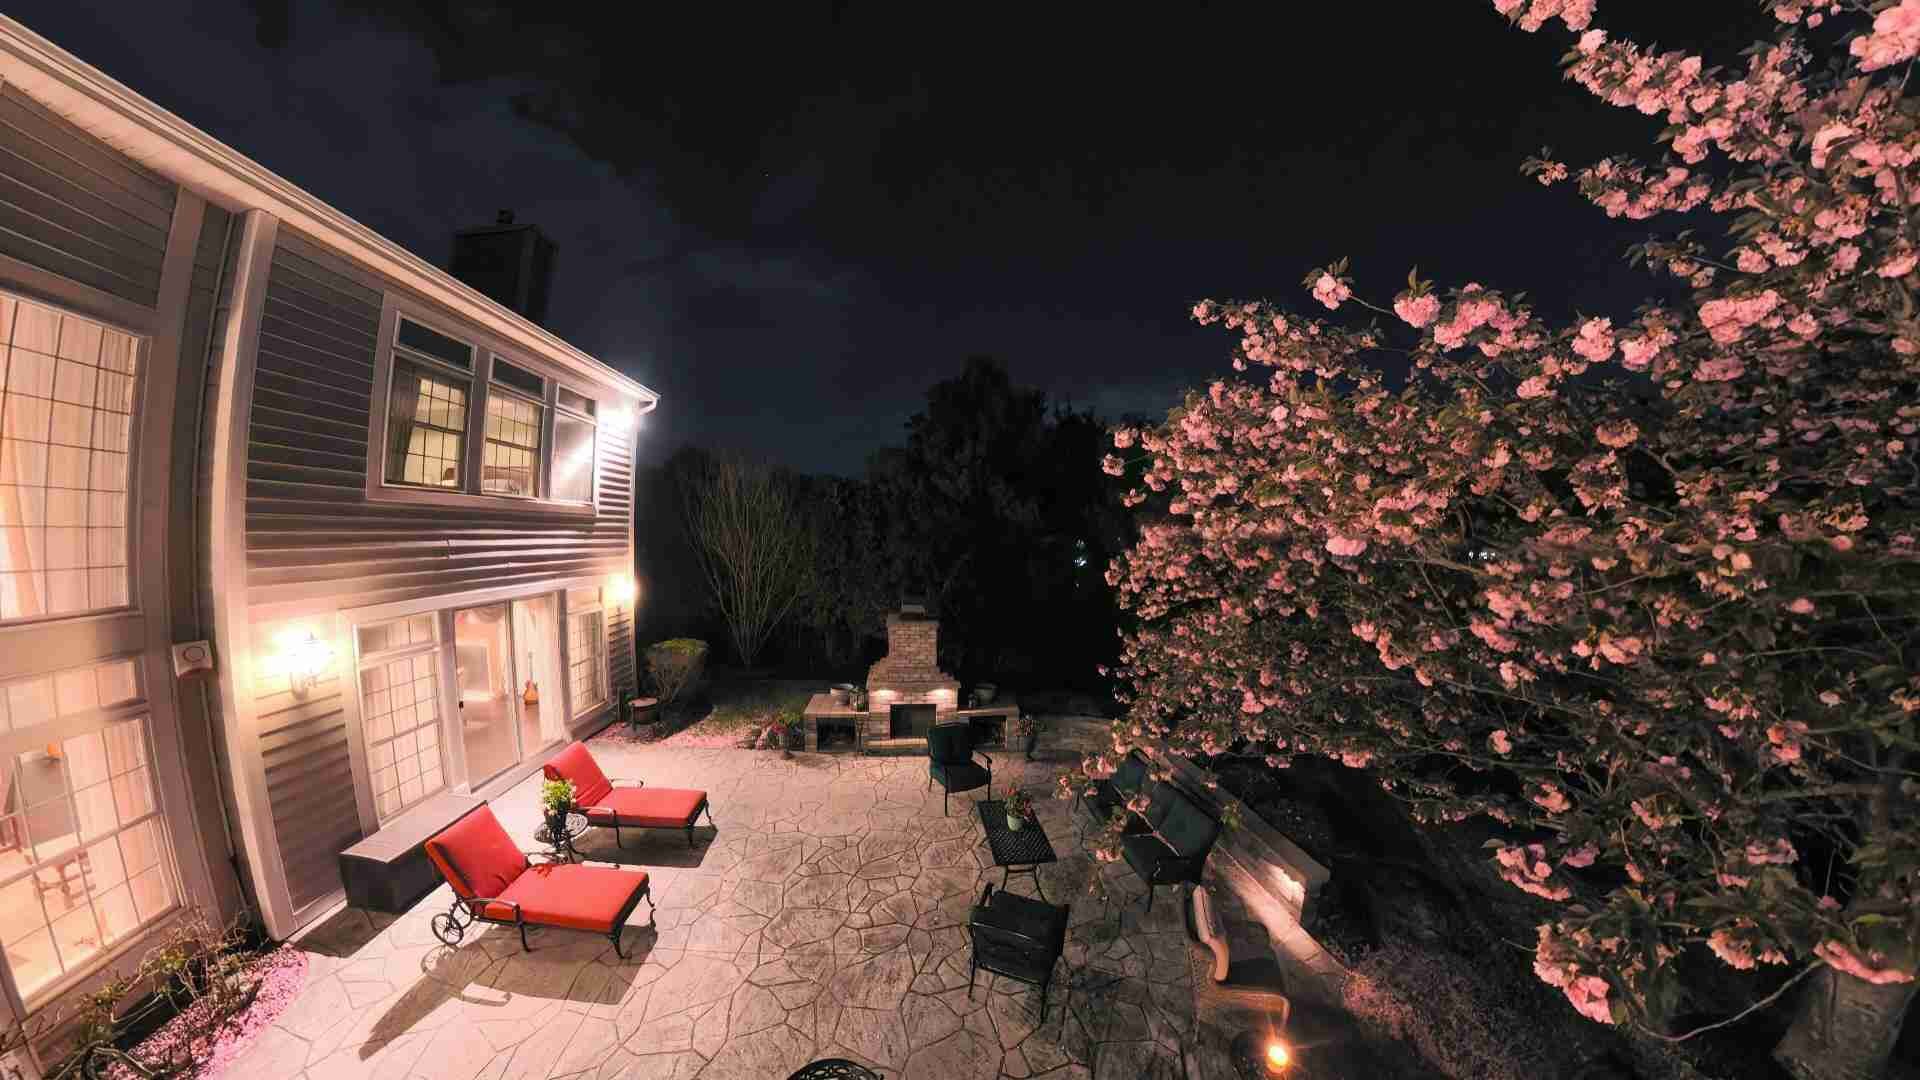
The Avata 2 was flown to mid-height and held in a hover at the center of the backyard — no tripod, no ground mount. This is one of the genuine advantages of drone-based 360° capture over traditional tripod photography: the ground beneath the camera is fully visible, completely unobstructed. A tripod-mounted 360° camera always has to contend with its own legs in the frame, which means either cloning them out in post or accepting a blind spot directly below. A hovering drone has no footprint. The equirectangular file shows clean earth beneath the camera position, and that nadir shot — the straight-down view — is part of what buyers see when they drag the panorama all the way down. That position matters in the other axes too. Too close to the house and you lose the yard. Too far back and the house shrinks. Mid-yard, mid-height, the viewer’s eye lands where a person actually stands when they step outside and take stock of the space.
The Edit: Photoshop for Color and Sky
The raw equirectangular file came off the camera flat and slightly cool — typical of night captures where the sensor is reading ambient darkness as its baseline. The editing happened entirely in Photoshop, working directly on the equirectangular image before any viewer processing.
The primary adjustments: white balance warm-shifted to pull the interior light toward amber rather than the hospital-white that LED fixtures often produce in camera. Shadow recovery in the lawn and mid-ground, keeping detail in the darkest areas of the yard without lifting the sky — the sky needs to read as true night. Highlights on the lit windows were pulled back slightly to prevent blowout while preserving the glow. Color grading through curves gave the image a slightly cinematic temperature separation: warm midground, cooler sky, the trees at the boundary sitting in between.
One edit that matters specifically for 360° work: the seam. Where the two fisheye hemispheres stitch together, you’ll sometimes find a ghosting artifact or a color discontinuity. On this image, there was a minor seam visible in the lawn at the stitch line. In Photoshop, that’s a content-aware fill and a clone stamp pass on a flattened layer — five minutes of work, but invisible if you skip it and immediately obvious if a buyer zooms into that section of the viewer.
The final file was exported as a JPEG at maximum quality, sized to serve web — the full-resolution file remains in archive for any future resizing or format conversion.
The Viewer: Pannellum
Backyard — Night · DJI Avata 2 · 8K equirectangular · Pannellum · Full tour ↗

Pannellum is an open-source WebGL-based 360° viewer. It’s what runs the viewer you see on the 360° Virtual Tours page on this site. It runs entirely in the browser — no third-party platform, no external branding in the frame. Just a JavaScript library that takes an equirectangular image and unfolds it into an interactive sphere.
The initialization is clean. You point Pannellum at the image URL, set your starting pitch and yaw (vertical angle and horizontal angle, respectively), define your field of view, and it renders. The backyard scene loads with a pitch of -10 degrees — tilted slightly down from the horizon, which is where your eye naturally goes when you step into a yard — and a yaw of 0, which puts the viewer looking directly at the back of the house.
Auto-rotation is enabled after five seconds of inactivity, at -1 degree per second. Slow enough that it reads as ambient rather than automated. Fast enough that a buyer who lands on the page and doesn’t interact immediately still gets the full arc of the space revealed to them.
The Hotspots: Four Photos Pinned to the Sphere
The four photo hotspots embedded in the backyard scene are the feature that converts a passive panorama into a navigable property document. Each one is pinned to a specific pitch and yaw coordinate in the sphere — those coordinates were identified using a development readout built into the page that displays live pitch and yaw as you click around the viewer.
The hotspot coordinates for the backyard scene:
- Photo 1 — pitch -12.20, yaw 168.44 — anchored to the rear fence line
- Photo 2 — pitch -16.37, yaw 88.27 — anchored to the east side of the yard
- Photo 3 — pitch -19.08, yaw -79.90 — anchored to the west
- Photo 4 — pitch -9.58, yaw 2.94 — anchored directly facing the house
Each hotspot opens its linked photograph in a new tab. The photos themselves are cropped pulls from the original equirectangular file — extracted from the exact region of the sphere the hotspot marks. The buyer who clicks a hotspot gets a high-resolution still of the precise area they were looking at, without distortion. Equirectangular files contain the full-resolution detail of every angle; extracting crops from them in Photoshop, using the right rectangular selection at the right location in the 2:1 frame, produces clean rectilinear photographs.
The hotspot CSS class is custom — `mp360-hs-photo` — styled as a small camera icon that reads differently from a standard info hotspot. The click behavior opens a new tab via `window.open` with `noopener` for security. On mobile, the tap target is sized generously to account for touch precision.
Mobile: The Two-Finger Problem and How We Solved It
Mobile is where most 360° viewer implementations break down. The fundamental conflict: the browser’s default one-finger gesture is page scroll. Pannellum wants one finger to rotate the panorama. These two behaviors fight each other, and if you don’t resolve that conflict deliberately, the viewer is unusable on a phone — the buyer tries to look around and scrolls the page instead.
Our implementation adds a touch event intercept on the viewer element. Single-finger touches on the panorama are captured and stopped from propagating to the page’s scroll handler. Two-finger gestures (pinch-to-zoom) pass through normally. When a mobile visitor lands on the page for the first time, an overlay appears over the viewer explaining the two-finger navigation convention, with an animated graphic. A tap anywhere dismisses it. The dismissal state is stored in sessionStorage, so returning visitors during the same session don’t see the prompt again.
The overlay reads: Use Two Fingers — Scroll the page with one finger. Use two fingers to look around. Direct. No visual decoration. Gone the moment you touch it.
The viewer itself also adapts its aspect ratio for mobile. On desktop it renders wide — landscape, the natural shape of a panorama in a page layout. On a phone, that same shape produces a viewer that’s too short to feel immersive. Below 600px, the CSS shifts the container to a taller vertical format, giving the panorama more height to breathe. The Pannellum canvas fills whatever dimensions it’s given without any additional JavaScript — the responsive shift is entirely CSS. Here’s what that vertical view looks like on a phone:
The same panorama in vertical mobile format · 380px wide · 660px tall
Fullscreen: Real API Where Available, Faked Where Not
The fullscreen button in the top corner of the viewer calls the browser’s native Fullscreen API — `element.requestFullscreen()` — when available. That’s Chrome, Firefox, Edge, most modern mobile browsers. On Safari and iOS, where the Fullscreen API has historically been absent or inconsistent, the viewer falls back to a CSS-driven fake fullscreen: the viewer wrap gets `position: fixed`, `inset: 0`, `z-index: 9999`, and expands to fill the viewport. Visually identical to real fullscreen. Functionally close enough that most users don’t notice the difference.
On exit — whether via the button, the Escape key, or the browser’s native exit mechanism — the viewer calls `viewer.resize()` after a 100-millisecond delay to force Pannellum to recalculate its canvas dimensions. Without that call, the viewer can render at the wrong size after the fullscreen transition.
Why This Matters for Your Listing
I didn’t build this to have something impressive to show at a listing appointment. I built it because a backyard is one of the three or four spaces that determine whether a buyer who saw your listing online makes the call to schedule a showing. And a flat photograph — even a great one — cannot convey a backyard the way standing in it does.
The 360° tour is the closest thing to standing in it that a buyer in Manhattan, or Connecticut, or anywhere else can get before they drive out. The hotspot pulls give them detail. The fullscreen mode gives them immersion. The night lighting gives them something they haven’t seen in the hundred other listings they scrolled past that week.
If you’re selling a home with a yard worth seeing — which, on the North Shore, is most of them — this is how we show it.
This post was written by Peter Kalafatis, who handles digital infrastructure, content production, and marketing technology at Maison Pawli.
Real estate markets change. For current listings and market data, contact Pawli at Maison Pawli.
You Might Also Like
- Virtual Tour Fatigue Is Real — and the Listing That Cracks It in Port Jeff Will Win the Out-of-State Buyer
- Virtual Tour, Real Liability: The Emerging Legal Exposure When 3D Open House Technology Misrepresents Condition
- The Staging Mistake That Costs Long Island Sellers $15,000 at the Table